> ## Documentation Index
> Fetch the complete documentation index at: https://help.uninote.ai/llms.txt
> Use this file to discover all available pages before exploring further.
# Syncing Calendar (Google / Microsoft)
By syncing your calendar with Uninote, you can import schedules and utilize related features.
This article outlines the steps to integrate with Google Calendar / Microsoft 365.
***
### Common: Open the Connection Screen
1. Open the \[Calendar] screen.
2. Select \[Connect].\\
 ***
* Sync Google Calendar
1. Click \[Connect] for Google Calendar.
2. Log in with your Google account.
3. When the access permission confirmation screen appears, grant the permissions.
***
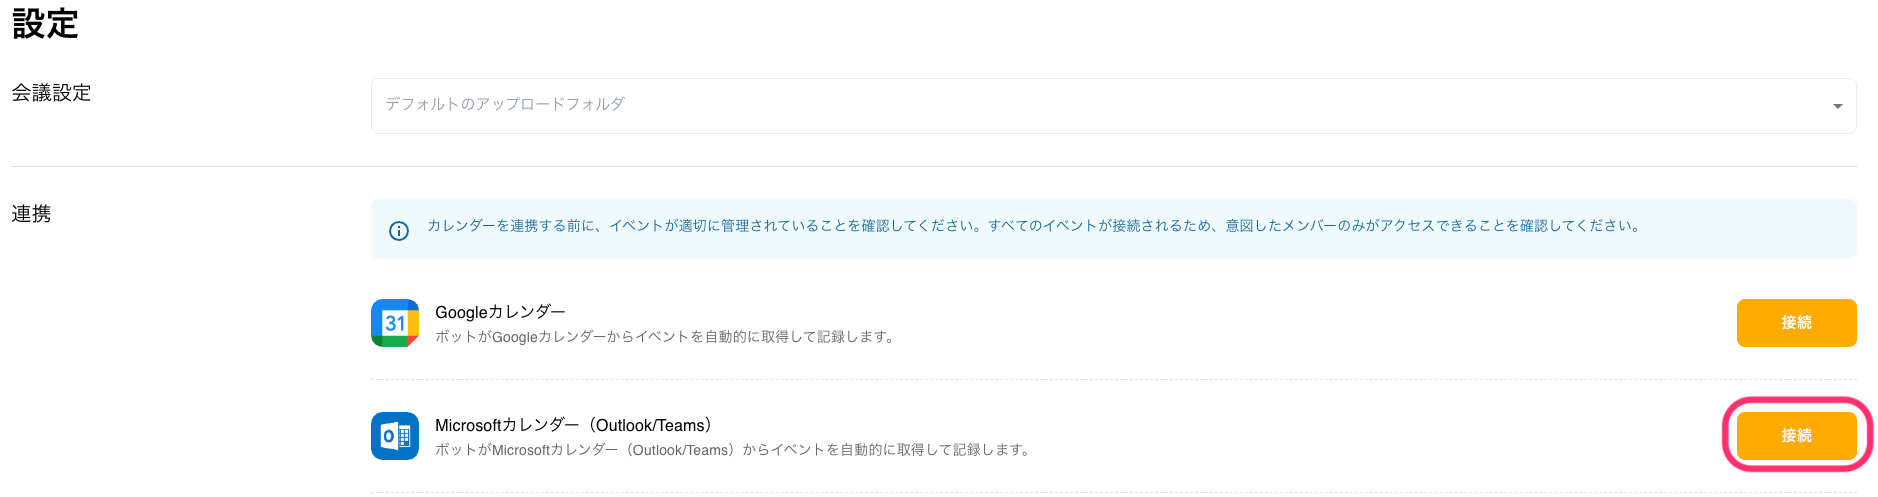
* Sync Microsoft 365 Calendar
1. Click \[Connect] for Microsoft Calendar.\\
***
* Sync Google Calendar
1. Click \[Connect] for Google Calendar.
2. Log in with your Google account.
3. When the access permission confirmation screen appears, grant the permissions.
***
* Sync Microsoft 365 Calendar
1. Click \[Connect] for Microsoft Calendar.\\
 2. Log in with your Microsoft account.
3. If organizational approval is required, please request permission from your administrator.
***
### Adding Meetings Without Calendar Sync
Even if you do not use calendar integration, you can manually register from \[+New Meeting].
1. Open the \[Meeting] screen.
2. Click \[+New Meeting].\\
2. Log in with your Microsoft account.
3. If organizational approval is required, please request permission from your administrator.
***
### Adding Meetings Without Calendar Sync
Even if you do not use calendar integration, you can manually register from \[+New Meeting].
1. Open the \[Meeting] screen.
2. Click \[+New Meeting].\\
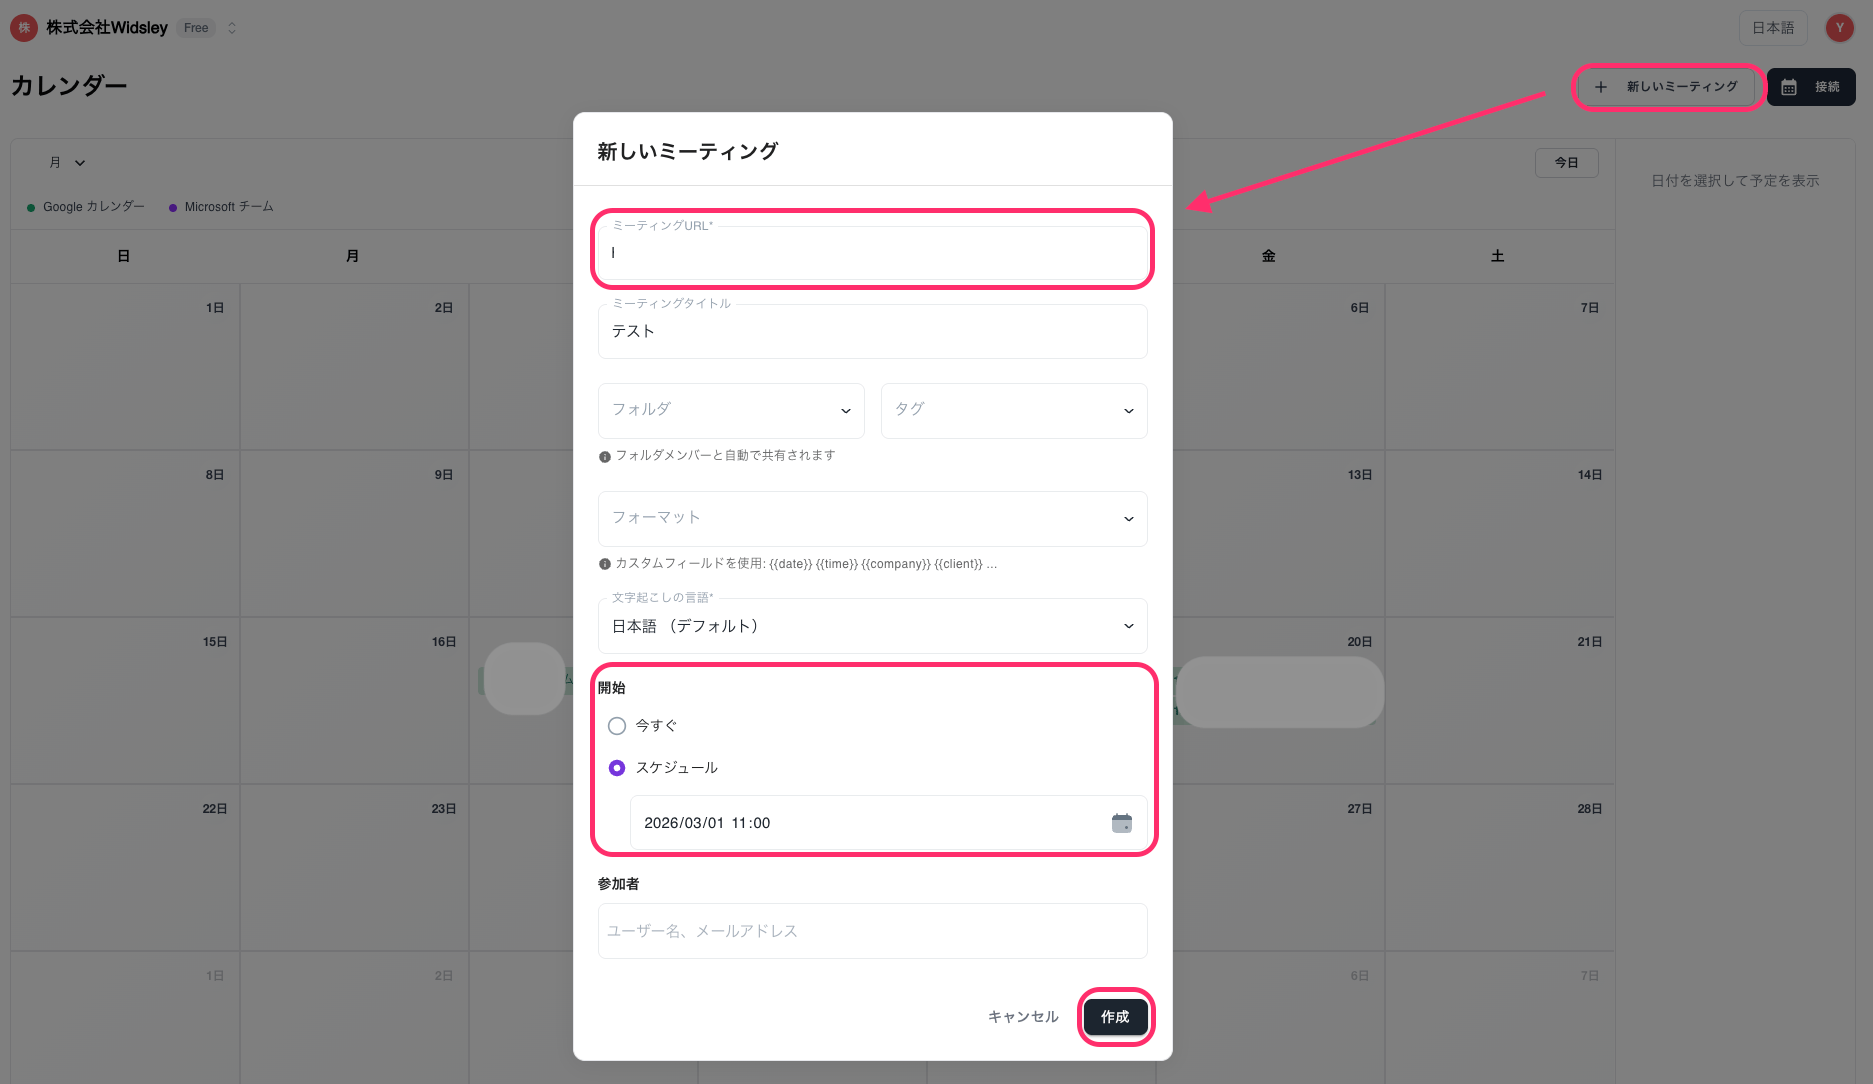 3. Enter the meeting information.
* Meeting URL
* Title
* Save folder, tags
* Date and time
* Participants
4. Click \[Create] to complete.
3. Enter the meeting information.
* Meeting URL
* Title
* Save folder, tags
* Date and time
* Participants
4. Click \[Create] to complete.