> ## Documentation Index
> Fetch the complete documentation index at: https://help.uninote.ai/llms.txt
> Use this file to discover all available pages before exploring further.
# カレンダーを同期する(Google /Microsoft)
カレンダーを Uninote と同期することで、予定を取り込み、関連機能を利用できます。
本記事では、Google カレンダー / Microsoft 365 と連携する手順をまとめています。
***
### 共通:接続画面を開く
1. [カレンダー]画面を開きます。
2. [接続]を選択します。\\
 ***
* Google カレンダーを同期する
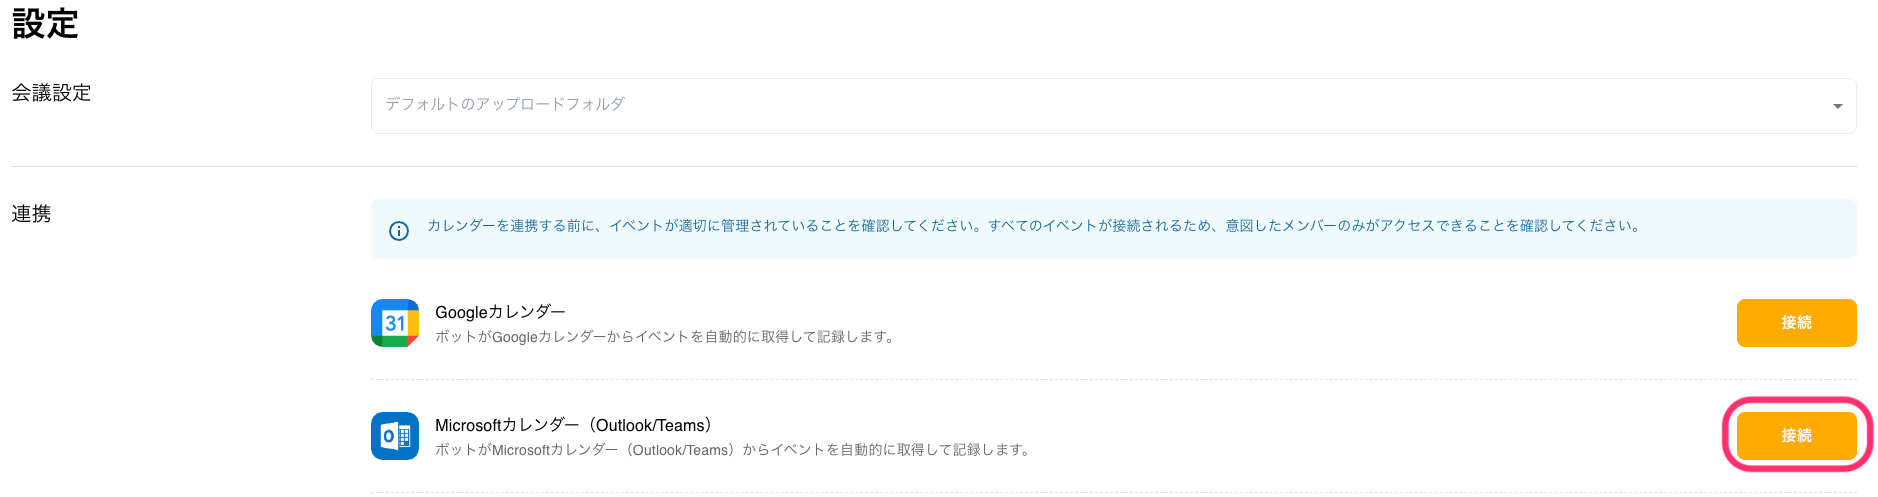
1. Google カレンダーの[接続]をクリックします。
2. Google アカウントでログインします。
3. アクセス権限の確認画面が表示されたら、権限を許可します。
***
* Microsoft 365 カレンダーを同期する
1. Microsoft カレンダーの[接続]をクリックします。\\
***
* Google カレンダーを同期する
1. Google カレンダーの[接続]をクリックします。
2. Google アカウントでログインします。
3. アクセス権限の確認画面が表示されたら、権限を許可します。
***
* Microsoft 365 カレンダーを同期する
1. Microsoft カレンダーの[接続]をクリックします。\\
 2. Microsoft アカウントでログインします。
3. 組織の承認が必要な場合は、管理者に許可を依頼してください。
***
### カレンダー同期を使わずにミーティングを追加する
カレンダー連携を使わない場合でも、[+新規ミーティング]から手動で登録できます。
1. [ミーティング]画面を開きます。
2. [+新規ミーティング]をクリックします。\\
2. Microsoft アカウントでログインします。
3. 組織の承認が必要な場合は、管理者に許可を依頼してください。
***
### カレンダー同期を使わずにミーティングを追加する
カレンダー連携を使わない場合でも、[+新規ミーティング]から手動で登録できます。
1. [ミーティング]画面を開きます。
2. [+新規ミーティング]をクリックします。\\
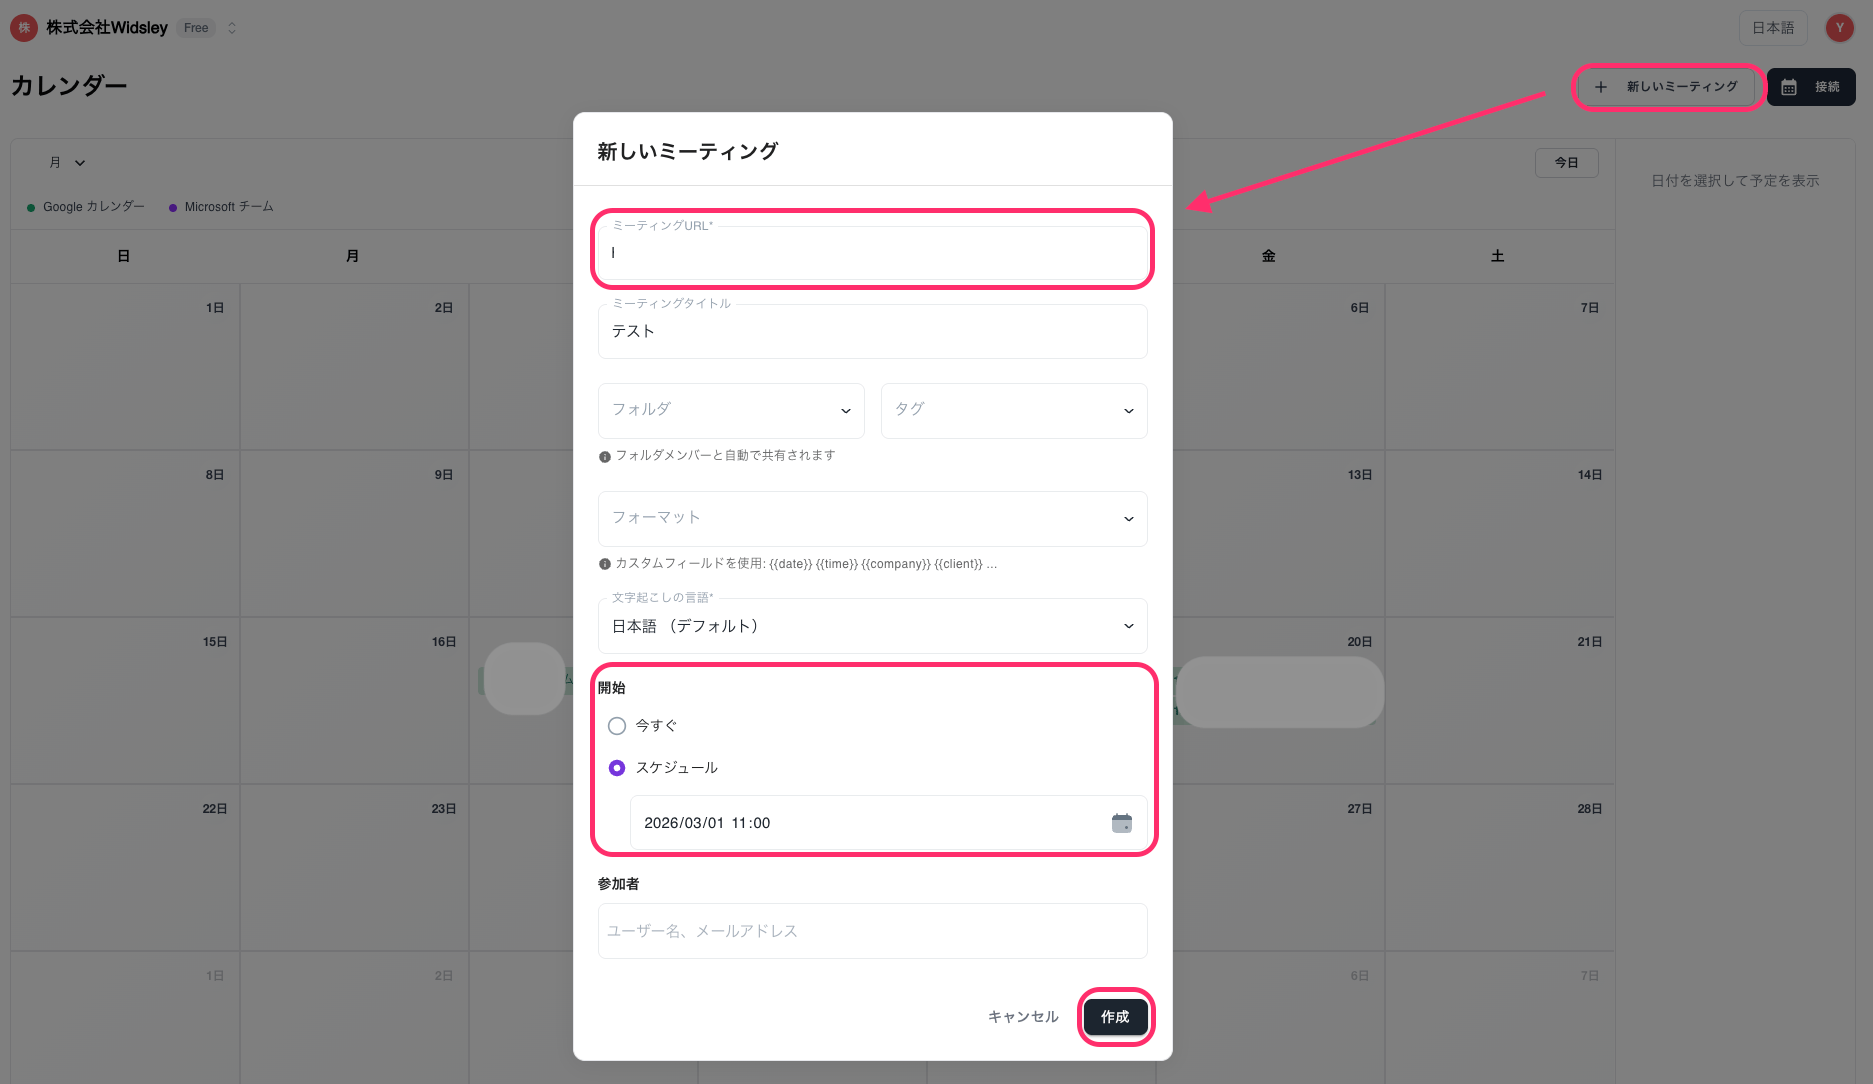 3. ミーティング情報を入力します。
* ミーティング URL
* タイトル
* 保存先フォルダ、タグ
* 日時
* 参加者
4. [作成]をクリックして完了します。
3. ミーティング情報を入力します。
* ミーティング URL
* タイトル
* 保存先フォルダ、タグ
* 日時
* 参加者
4. [作成]をクリックして完了します。